Beginner’s Guide to DIY Wall Paneling

Wall paneling is an increasingly popular DIY trend that can add character and visual appeal to your home. It may seem like a daunting task, but with the right tools, some patience, and a creative vision, you can easily achieve professional-looking results. This beginner’s guide will walk you through the process, step by step, ensuring that your DIY wall paneling project is a success!

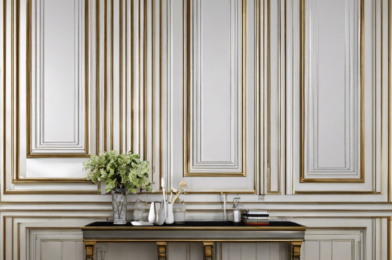
The first step is to measure and mark the wall where you want to install the paneling. Use a level to ensure that your panels are straight and even. It’s important to plan out the layout beforehand, including any cutouts for electrical outlets or switches. Take precise measurements and mark the wall accordingly to ensure a seamless installation. Consider the overall design and whether you want to create a specific pattern or layout with the panels.

Gathering the necessary tools and materials is key to a smooth installation process. You will need panels of your choice, which could be wood, MDF, or alternative paneling options. Ensure you have the appropriate adhesive or fasteners, such as construction adhesive, finishing nails, or a nail gun. A stud finder, level, measuring tape, and a miter saw for cutting the panels are essential. Don’t forget safety gear, including eye protection and a dust mask.

Preparing the wall is crucial for a smooth and durable installation. Remove any outlet covers and switch plates, and fill in any holes or cracks with spackling compound. Sand the wall to create a smooth surface, and if you’re applying paneling to a painted wall, consider scuffing the paint with sandpaper to help the adhesive bond better. Cleaning the wall with a damp cloth to remove any dust or grime is also important to ensure a solid adhesion.
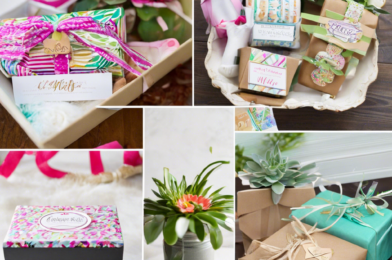
Creative DIY Gift Ideas for Any Occasion

With countless holidays, birthdays, and special events sprinkled throughout the year, finding the perfect gift can be a challenge. While it’s easy to resort to generic presents, putting thought and creativity into your gift-giving can truly make someone’s day. So, if you’re seeking unique and memorable DIY gift ideas, look no further!

There’s nothing quite like a handmade gift to show someone you care. It demonstrates thoughtfulness, effort, and a personal touch that store-bought items often lack. The beauty of DIY gifts is that they can be tailored to the recipient’s interests, creating a heartfelt and one-of-a-kind present. Whether you’re a crafting novice or expert, there are endless possibilities to explore.

For the foodie in your life, consider creating a custom recipe book. Compile their favorite dishes, family recipes, or a collection of meals tailored to their taste buds. You can even include personal photos and anecdotes to make it extra special. Present it in a beautiful binder or handcrafted folder, and you’ve got a gift that will be treasured for years.

If you’re artistically inclined, put your skills to use! Paint or draw something meaningful to the recipient. It could be a portrait, a beloved pet, or a scene from their favorite vacation spot. Framing your artwork adds a nice finishing touch, making it instantly displayable. Alternatively, craft something functional and aesthetically pleasing, like a handmade clock, a painted plant pot, or a unique piece of jewelry.

DIY Shelving Solutions to Organize Your Space

Are you tired of clutter and chaos taking over your home or office? It’s time to embrace the beauty of organization with some simple DIY shelving solutions! Creating functional and attractive storage spaces can transform your environment and bring a sense of order to your life. Whether you’re aiming for a sleek and modern look or a cozy, rustic feel, there are countless creative ways to add shelving and maximize your space.

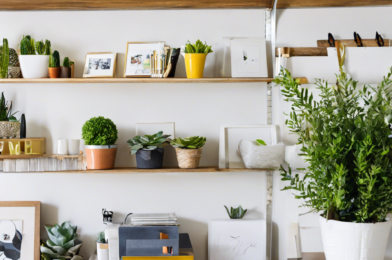
First, consider the variety of shelving options available. Floating shelves are a popular choice for a sleek, minimalist look. Easy to install and extremely versatile, floating shelves can be arranged in countless configurations to suit your needs. Another option is to create built-in shelves. While this may sound complicated, it simply involves using ready-made bookcases or custom-built shelves to create a seamless, integrated storage system. Built-ins are perfect for under-utilized spaces like nooks or alcoves, adding a touch of elegance and maximizing storage potential.

For a more rustic or industrial aesthetic, try open-frame shelving. This style often incorporates metal piping or wooden planks to create a unique, airy look. Open-frame shelving is perfect for displaying decorative items or storing everyday objects in an accessible manner. If you’re handy with tools, you can even try crafting your own shelves from reclaimed wood or upcycled materials for an eco-friendly, one-of-a-kind design.

Don’t forget to consider the functionality of your shelves. Adjustable shelving is a smart choice, allowing you to modify the height and arrangement of shelves to accommodate items of various sizes. This versatility ensures that your storage solution can adapt to your changing needs over time.

With a bit of creativity and some elbow grease, you can transform your space and bring order to potential chaos. So, embrace your inner organizer and get started on your DIY shelving journey today!

Now, for some practical tips to get you started:

Measure Twice, Cut Once: Proper measurement is key to successful shelving installation. Before drilling holes or cutting wood, ensure you’ve measured the space and marked the spots where the shelves will hang. A laser level can be extremely helpful for accuracy. Plan It Out: Visualize how you want your shelves to look and function. Consider the items you’ll be storing and the overall aesthetic you wish to achieve. This will guide your choices on shelf size, material, and configuration.

Start Simple: You don’t need to be a master carpenter to create beautiful shelves. Start with simple, easy-to-install options like floating shelves or basic bookcases. As your confidence and skills grow, you can take on more complex projects.

With these tips in mind, you’re well on your way to becoming a shelving pro!

No-Sew DIY Pillow Covers for an Easy Room Refresh

Do you want to give your living space a quick and easy makeover? Consider refreshing your throw pillows with DIY no-sew covers! This simple project can instantly transform the look and feel of any room, and it’s a budget-friendly way to experiment with the latest trends or give your old pillows a new lease on life. Here’s a step-by-step guide to creating your own no-sew pillow covers for an effortless room refresh.

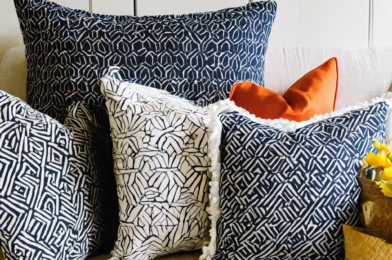
First, gather your supplies: all you need is fabric of your choice, scissors, measuring tape, and fabric glue or a hot glue gun. The beauty of this project is that you can choose any fabric that catches your eye, from trendy patterns to luxurious textures. Think about the mood you want to create in your space – calm and neutral or bold and vibrant – and select your fabric accordingly.

Measure and cut your fabric to size, allowing for a few extra inches on each side to create a neat overlap when gluing. You can always trim excess fabric later, so it’s better to be generous with your initial cut. A good rule of thumb is to add 4-5 inches to the height and width of your pillow for the perfect overlap.

Once your fabric is cut, it’s time to start gluing. Place your pillow in the center of the fabric and fold the edges, creating crisp corners. Secure the edges with a thin layer of fabric glue or hot glue, working in small sections to avoid drying before you’re finished. Take your time with this step to ensure a smooth and secure finish.

The result is a stylish and sophisticated pillow that looks professionally made. This no-sew method is perfect for those who want to avoid the hassle of sewing machines and needles. Not only is it incredibly easy, but it also allows for a wide range of creative options to personalize your space. Experiment with different fabrics, colors, and textures to create unique pillow covers that reflect your individual style.

If you’re feeling extra creative, embellish your pillow covers with accessories such as buttons, ribbons, or trim. You can also mix and match different fabrics for a truly unique look. The possibilities are endless! Remember, this is a fun and simple project that can be completed in an afternoon, giving your space an instant boost. So, get crafting and enjoy your refreshed and cozy space!

No-sew DIY pillow covers are a brilliant way to experiment with home decor trends without committing to expensive purchases. You can easily change them with the seasons or whenever you feel like switching up your space. Involve your family and friends for a fun craft day, creating personalized pillow covers that reflect everyone’s unique personalities.

Pillows are often overlooked, yet they play a significant role in the overall ambiance of a room. By simply changing the covers, you can go from a dull and dated space to a vibrant and modern haven. This easy project is perfect for renters who want to personalize their temporary space and for homeowners looking for a quick and affordable update. So, embrace your inner designer and give your pillows a DIY makeover!

Mason Jar Crafts for Every Room In Your Home

The humble Mason jar has come a long way from its original purpose of preserving and canning foods. Today, it has become a beloved staple for crafters and DIY enthusiasts, offering endless possibilities for creative and functional home décor. With a few simple supplies and a bit of imagination, you can transform these versatile jars into stylish accents for every room in your house.

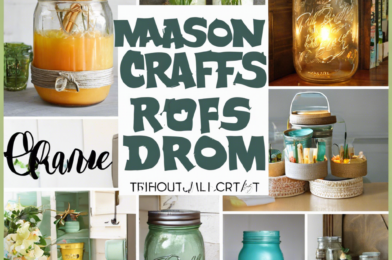
Let’s start with the living room. Create a cozy ambiance by turning Mason jars into lanterns. Fill them with tea lights or string lights and hang them from the ceiling or place them on side tables for a soft, warm glow. For a touch of greenery, make hanging planters by attaching jars to wooden boards and filling them with your favorite succulents or air plants.

In the kitchen, Mason jars are perfect for organizing and storing dry goods. Label them with chalkboard paint or twine for a rustic touch, and fill them with pasta, beans, or spices. You can also use them as drinking glasses or to store utensils and straws on the counter.

For a fun bathroom accent, turn a Mason jar into a soap dispenser. Fill it with your favorite liquid soap and add a pump dispenser for a unique and eco-friendly way to wash your hands. You can also create a mason jar tissue holder. This will give your bathroom a crafty, farmhouse feel.

Bring the outdoors in with a Mason jar herb garden. These jars are perfect for growing basil, parsley, or chives on a windowsill or countertop. You can also make a hanging vase for fresh or dried flowers, adding a pop of color and charm to your dining area.

Transform your bedroom into a relaxing sanctuary with Mason jar nightlights. Paint the jars with your favorite colors or patterns and place LED candles inside for a gentle glow on your bedside table. You can also use them to store small items like jewelry or hair ties, keeping your space organized and stylish.

Welcome guests with a Mason jar wreath. Decorate it with flowers, greenery, or seasonal accents, and hang it on your front door for a warm and inviting entrance. You can also create a mason jar lantern to illuminate your porch or entryway, setting the tone for a cozy and welcoming home.

Mason jars are incredibly versatile and perfect for crafting on a budget. With a little creativity, you can easily transform them into beautiful and functional accents for any room in your home. So, get crafting and give your space a touch of rustic charm!

Home Office DIY Projects for a Productive Workspace

Working from home has become the new normal for many of us, and creating a productive and inspiring workspace can help us stay focused and motivated. Here are some DIY projects to transform your home office into an efficient and stylish haven.

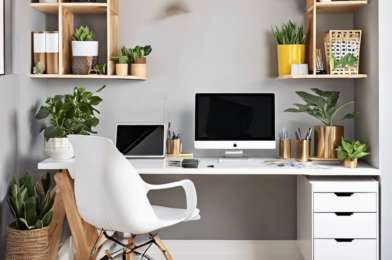
First, let’s talk about organization. A clutter-free space is essential for a productive mindset. Install floating shelves to display your books and decorative items or opt for closed cabinets if you prefer a sleek, minimalist look. Utilize baskets and labeled boxes to categorize and store miscellaneous items. For a personalized touch, try framing a fabric that complements your room’s color scheme and pinning it to a corkboard.

Lighting is another crucial element. Aim for a combination of natural and artificial light to avoid eye strain and create a bright, welcoming atmosphere. If your room receives limited daylight, consider a statement lamp or unique ceiling fixture to add both illumination and character. Play with different bulb intensities to find the most flattering and efficient setup for those endless Zoom meetings.

To define your workspace and boost creativity, create an accent wall. You can experiment with bold colors or textured wallpaper to craft a vibrant backdrop for those video calls. Alternatively, for a more subtle approach, try a neutral shade that still adds depth to the room, such as a soft gray or beige.

Investing in a quality desk and ergonomic chair is essential for your comfort and posture. Look for pieces that complement your room’s style and provide ample storage. You can also try crafting your desk with industrial pipes and wooden planks for a rustic, one-of-a-kind piece. Don’t forget to personalize your space with artwork and greenery. Framed prints, paintings, or even a gallery wall of your favorite photos will make your office feel unique and inspiring. Add pops of color with plants, which also help purify the air and boost your overall well-being.

For a quick and easy update, swap out standard hardware for stylish knobs and pulls on drawers and cabinets. Experiment with mixed metals or colorful accents to add an unexpected twist. Lastly, don’t forget the little details that elevate your space, such as a decorative wastebasket, a stylish mouse pad, or a unique desk organizer.

Whether you’re aiming for a complete office makeover or simple upgrades, these DIY projects will help you create a home office that blends functionality and style. So, get crafting, and happy working!

I hope this article meets your expectations. If you would like to change something, please let me know.

Decorating on a Dime: Affordable DIY Ideas

The world of interior design is exciting and ever-evolving, offering endless possibilities for creativity and expression. However, professional designers and fancy decorations can come at a steep price. So, how can you achieve a stylish and comfortable home without breaking the bank? It’s all about embracing the DIY (do-it-yourself) spirit and getting creative!

Firstly, let’s talk about the power of paint. A fresh coat of paint in a new color can completely transform a room, and it’s one of the most affordable ways to make a big impact. Opt for light and neutral colors to make a space feel larger and brighter, or go bold with a feature wall in a rich hue to create a focal point. Don’t forget that paint isn’t just for walls – you can also update old furniture with a lick of paint, giving it a new lease of life.

Wall art is another inexpensive way to add personality to your space. Create your own gallery wall by printing and framing favorite photos or artwork, or try your hand at creating your own masterpieces. Even simple line drawings or abstract paintings can look incredibly effective when displayed proudly on your walls. Embrace your inner artist and don’t be afraid to experiment!

When it comes to furniture, there’s no need to spend a fortune. Second-hand and vintage pieces offer unique character and charm, and they’re often much kinder to your wallet. Explore thrift stores, garage sales, and online marketplaces to uncover hidden gems just waiting for a new home. With a bit of elbow grease and some creative vision, you can transform these pre-loved finds into stunning centerpieces for your home.

Curtains and blinds can also be made yourself relatively easily and cheaply. All you need is some fabric, a sewing machine, and a basic understanding of how to put them together. This way, you can choose the exact color, pattern, and style that you want, and you’ll save a small fortune on having them custom-made.

Similarly, making your own throw pillows is a breeze and a brilliant way to showcase your personal style. Whether you opt for funky patterns, textured fabrics, or embroidered details, these accents can bring a room to life. It’s the little touches like these that really make a house a home, and they don’t have to cost the earth.

Don’t underestimate the impact of greenery in your home. Houseplants are an inexpensive way to add life, color, and texture to any room. From trailing ivy to tall palm trees, there’s a plant to suit every space and style. Not only do they look great, but they also improve air quality and boost your mood. If you’re not much of a gardener, start with low-maintenance options such as snake plants or succulents.

Finally, let’s shine a light on the importance of lighting. Creating the right ambiance can completely change the feel of a room, and it doesn’t have to cost a fortune. From statement lampshades to fairy lights, there are plenty of affordable options to choose from. Try hanging a string of fairy lights over your bed or draping them around a mirror for a touch of magic.

Fun DIY Crafts to Do With Kids This Weekend

Looking for some fun and creative ways to spend time with your kids this weekend? Why not try out some DIY crafts that will not only keep them entertained but also spark their creativity and nurture their artistic skills? DIY projects offer a fantastic opportunity to bond with your little ones while teaching them valuable skills and fostering a sense of accomplishment. This weekend, try out these fun and easy DIY crafts that are sure to bring smiles to your children’s faces and create lasting memories.

First up, get ready for some messy fun with paint-blowing! All you need is some washable paint, straws, and paper. Let your kids dip the straws into the paint and blow, creating unique and colorful masterpieces. This activity is not only exciting but also helps develop fine motor skills and encourages creativity. Next, try making your own playdough. With simple ingredients like flour, water, salt, and food coloring, your kids can help measure and mix the ingredients before kneading and shaping their very own dough. This DIY project promotes sensory exploration and encourages imagination as your kids mold their creations.

Another craft idea is to create colorful suncatchers using tissue paper and contact paper. Cut out shapes from the tissue paper, such as flowers or butterflies, and let your kids arrange them on the contact paper. Hang their beautiful creations on windows, allowing sunlight to shine through, illuminating their artwork. For a fun outdoor activity, go on a nature walk and collect sticks, leaves, and rocks. Once you’re back home, help your kids create their own nature collage, arranging their findings on paper and gluing them down to preserve their outdoor adventures.

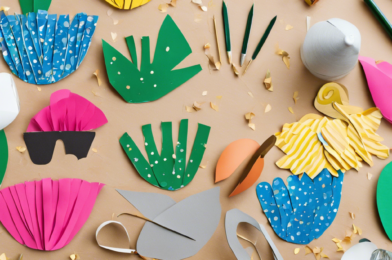
You can also teach your kids about recycling and sustainability by upcycling old items. For example, transform empty toilet paper rolls into adorable animals by cutting and decorating them. Your kids can make anything from owls to bunnies, letting their imaginations run wild. Alternatively, make your own bird feeders using pinecones, peanut butter, and birdseed. Your kids will love getting their hands sticky as they spread the peanut butter, and they’ll be thrilled to watch birds enjoy their tasty treats.

These DIY crafts offer a range of benefits for your kids, from enhancing motor skills and creativity to providing sensory experiences and encouraging imaginative play. So, this weekend, roll up your sleeves, gather some simple materials, and get ready to make lasting memories with your little ones as you embark on these fun and engaging DIY projects together. Don’t forget to capture the moments with pictures, and your kids will cherish these special times forever.

Simple Sewing Projects Even Beginners Can Master

Whether you’re a sewing novice or a pro, there are countless simple sewing projects that can be fun and rewarding. From repairing torn clothing to creating unique accessories, sewing is a valuable skill that can save you money and help you personalize your wardrobe. If you’re a beginner, there are plenty of easy projects to get you started on your sewing journey.

One great option for beginners is to make a simple scarf. All you need is a lightweight fabric of your choice and a sewing machine. Simply cut the fabric to your desired length and width, fold and sew the edges, and you’re done! You can get creative with the fabric pattern and even add embellishments like buttons or tassels. This project is an excellent way to familiarize yourself with the sewing machine and basic stitching.

Another beginner-friendly project is creating cloth napkins. It’s an eco-friendly and cost-effective alternative to paper napkins. All you need is some fabric and a sewing machine. Cut the fabric into squares, and hem the edges for a polished look. You can make a set of napkins in various colors or patterns to match your dining aesthetic.

Sewing your own reusable grocery bags is also a straightforward project for novices. Opt for a sturdy fabric, such as canvas, and cut it into a rectangle shape with a bottom gusset. Fold over the top edges to create a sturdy hem, and add handles made from webbing or fabric tubes. Not only will your handmade bags be unique, but they’ll also contribute to reducing plastic waste.

If you’re feeling adventurous, you can try your hand at altering your clothing. Hemming pants or skirts is a useful skill to have, and it’s quite simple. Just measure the desired length, pin the fabric, and sew a new hem. You can also take in the sides of a too-loose garment to create a more tailored fit. These types of alterations can completely transform your wardrobe and ensure your clothes fit you perfectly.

For a decorative touch, novices can attempt to sew throw pillow covers. Decide on a pillow size, then cut the fabric slightly larger to account for hems and overlap at the back. Sew three sides shut, insert the pillow, and close the remaining side with neatly placed buttons or a simple envelope-style overlap. Boost your sewing confidence and add a unique touch to your home decor with this project.

Beginners can also sew a simple fabric pouch to hold cosmetics or other small items. Cut two rectangular pieces of fabric and sew them together, leaving an opening for turning. Turn the pouch right side out, press it flat, and topstitch around the edges for a neat finish. You can add a zipper or a simple button closure to secure your belongings.

Lastly, repairing your clothing is an essential skill that everyone should possess. Sewing on buttons, mending torn seams, and patching holes are all beginner-friendly tasks that will extend the life of your garments. With a few basic stitches and a needle and thread, you can easily repair your favorite pair of jeans or reinforce the seams of a well-loved shirt.

DIY Decor Trends for a Stylish Home in 2024

The world of interior design is ever-evolving, and each year brings a host of new trends to refresh our living spaces. As we move towards a new year, it’s time to explore the DIY decor trends that will define stylish homes in 2024. From bold color palettes to sustainable materials, here’s what you need to know to give your home a stylish update.

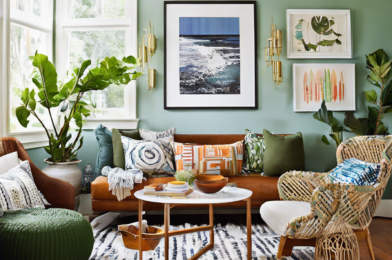
One of the most prominent trends for the coming year is the embrace of earthy tones and natural textures. Think muted clay reds, soft forest greens, and warm beiges. These colors provide a soothing and elegant backdrop to any room. It’s not just about paint though – bringing natural textures into your home through furnishings and decor is key. Look for rattan furniture, jute rugs, and earthenware pottery to add depth and a connection to nature.

Another emerging trend focuses on the use of bold, vibrant colors. While neutral palettes have dominated in recent years, 2024 is all about making a statement. Rich jewel tones like sapphire, emerald, and amethyst will be popular, adding a sense of luxury and drama to interiors. Don’t be afraid to experiment with colorful wallpapers, statement ceilings, or vibrant furniture pieces to create a unique and memorable space.

Sustainability is also a key consideration for 2024. Homeowners are increasingly conscious of the environmental impact of their choices, and this extends to their decor. Upcycling old furniture, choosing second-hand pieces, and using recycled materials are all ways to embrace this trend. Decorations made from sustainable sources, such as bamboo or ethically-sourced wood, are also great options.

DIY decor enthusiasts will be delighted to know that customizable furniture is also set to be a big trend. This allows you to personalize your space and create unique, one-of-a-kind pieces. Look for modular furniture that can be adapted to your needs or invest in customizable pieces that you can design yourself.

The trend of curved lines and soft shapes will continue to rise in 2024, offering a fluid and organic feel to any room. From sofas and chairs to kitchen counters and bathroom vanities, curved silhouettes bring a sense of elegance and modernity. This trend also extends to accessories, with curved lamps, mirrors, and artwork creating a harmonious and balanced interior.

Bringing the outdoors in is another key trend, and this can be achieved through a variety of means. Large windows and skylights that flood your home with natural light are one way to do this. Incorporating houseplants of varying sizes and species is another, adding a pop of color and improving air quality. Vertical gardens or living walls are also a stunning way to bring nature into your home.

Lastly, for those who love a touch of glamour, metallic accents will continue to shine in 2024. From brass and copper to rose gold and chrome, metallic finishes add a touch of luxury and elegance. Incorporate this trend through hardware, light fixtures, or statement furniture pieces.